
Have you seen the iridescent crystal-studded Christian Louboutin heels? And then fell in love with them (they look incredible in the light)? And then went into shock when you saw the $3,200 price tag? (!!!!!!)
Yeah, so did I. 🙂

[They are stunning, though!]
Seeing them gave me the inspiration to invest some money (less than $70) and about five hours of time to create my own Swarovski crystal-embellished heels for our wedding celebrations. It was my personal way of making myself feel like a princess, a la Cinderella and her sparkling glass slippers.

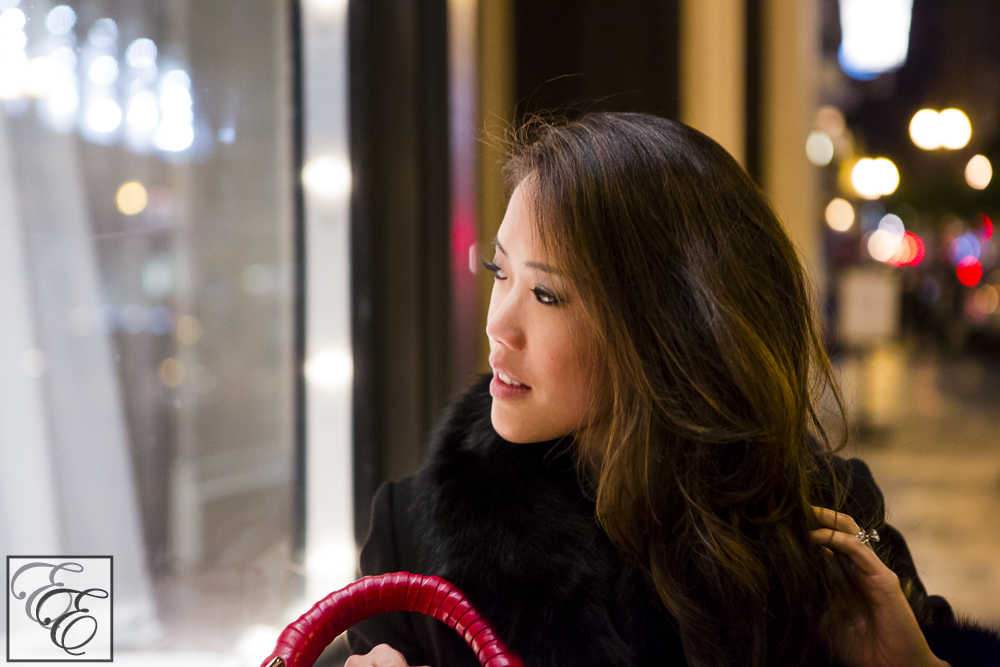
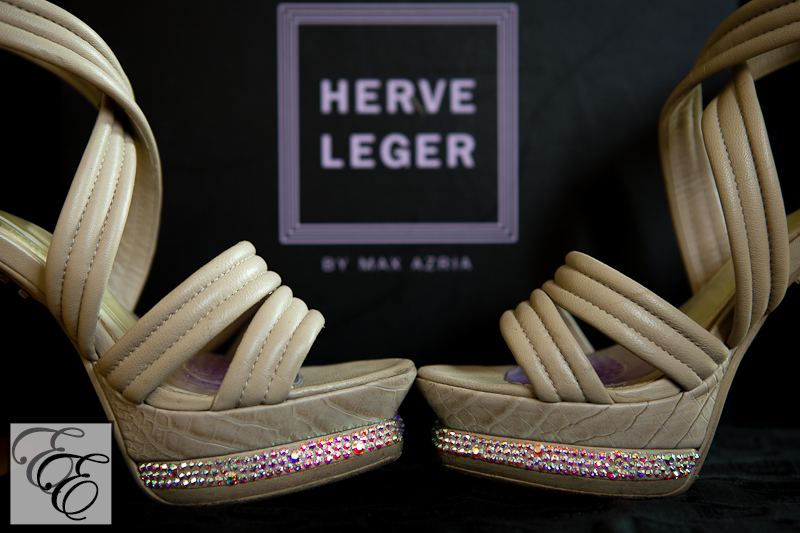
One day I’ll tell the story of my love affair with designer Herve Leger, and how that fortuitously lead to the unplanned discovery of my wedding dress. I wasn’t looking for a dress (heck, my husband J hadn’t even proposed by that point!), but when I saw it, I just knew it. When I went to try it on, the salesperson slipped me a pair of sandal heels for height.
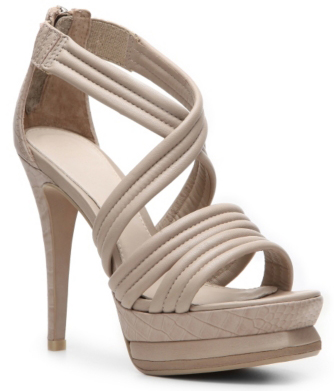
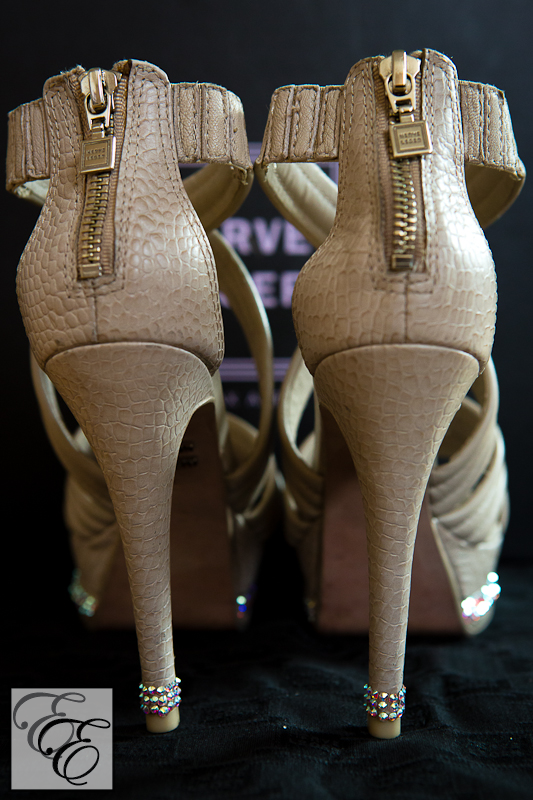
The heels are taupe strappy heels (OMG, they are now being offered at DSW for an incredible steal!) with a faux snakeskin print. Definitely not your typical delicate white satin and rhinestone wedding pumps.
But they were surprisingly comfortable, being the equivalent of a 3″ heel; 4.5″ heel height and 1.5″ platform. And, I knew they would be versatile for a number of other non-wedding occasions… after all, I had to consider their functionality given the cost of the investment!
So, I ended up walking out of the Herve Leger store with both a new dress and shoes. Yeah, it was an expensive window-shopping day. And it’s one that I’ve never, ever regretted. (Although after seeing them on sale today, I do wish I could have scored them for that price. You can, instead.) 🙂
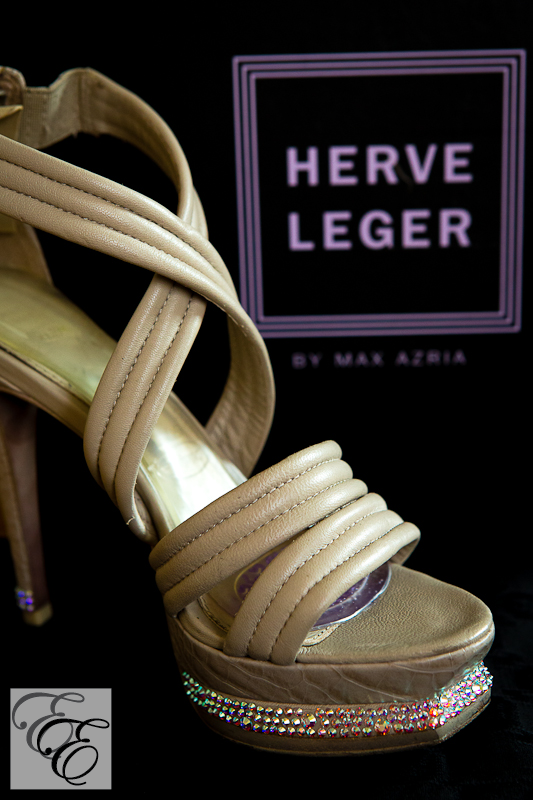
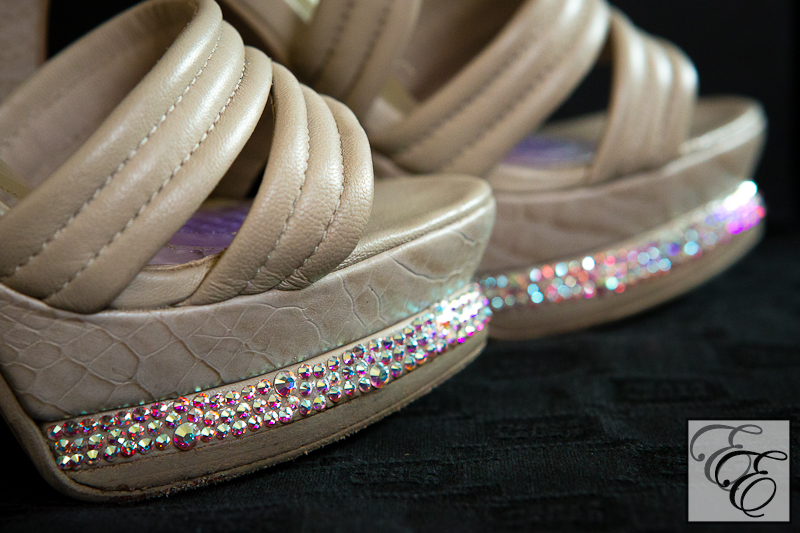
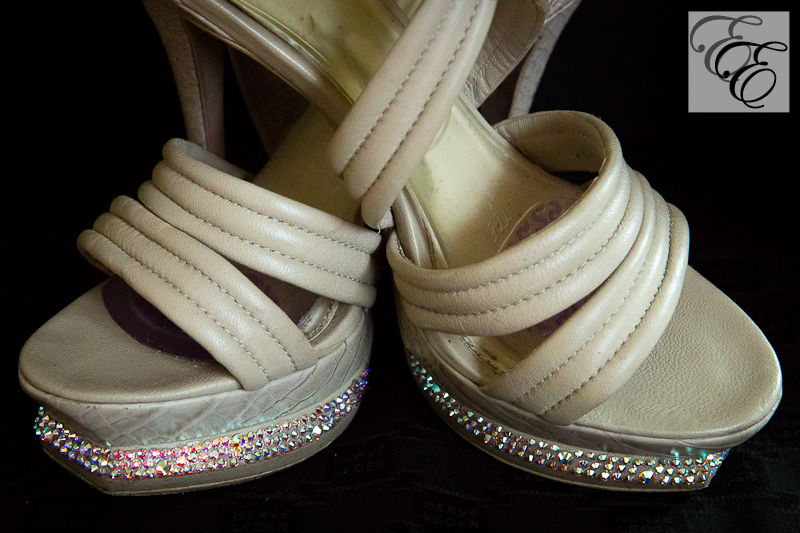
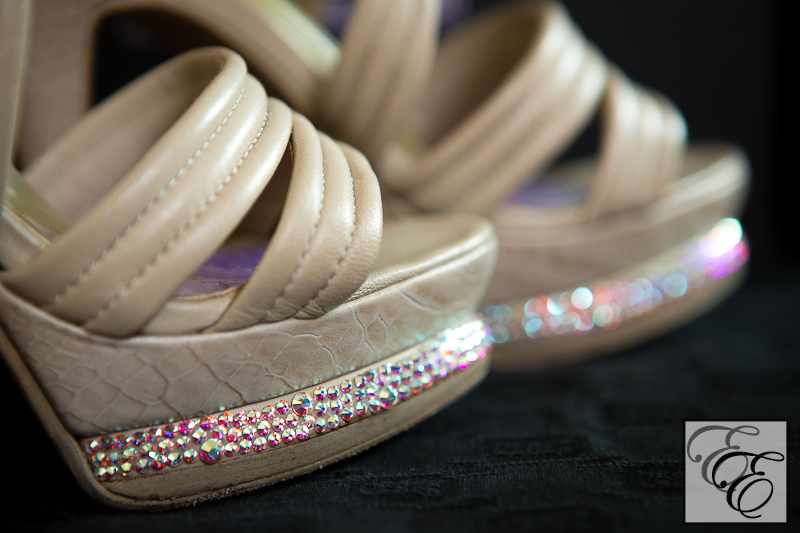
When deciding how to embellish the shoes, I had originally thought that I might glue crystals to the middle band of the criss-crossing ankle and toe straps. But upon consideration, I thought that might look a bit too overdone, and instead opted for a more subtle ribbon of crystals, not unlike the effect of a french-tipped manicure. There was a slightly-sloped smooth ledge along the platform that I decided to highlight. To add continuity to the effect, I also applied crystals to the heel, in the same width.
All it took was a combination of flat-back Swarovski crystals (I got a factory pack of size 10mm clear AB crystal flat-backs and a pack of size 12mm clear AB crystal flat-backs from INM Crystal, which I’ve found to have the best online price for authentic Swarovski elements), jewelry glue, and a fine-tipped pair of cross-locking tweezers to pick up and place crystals.
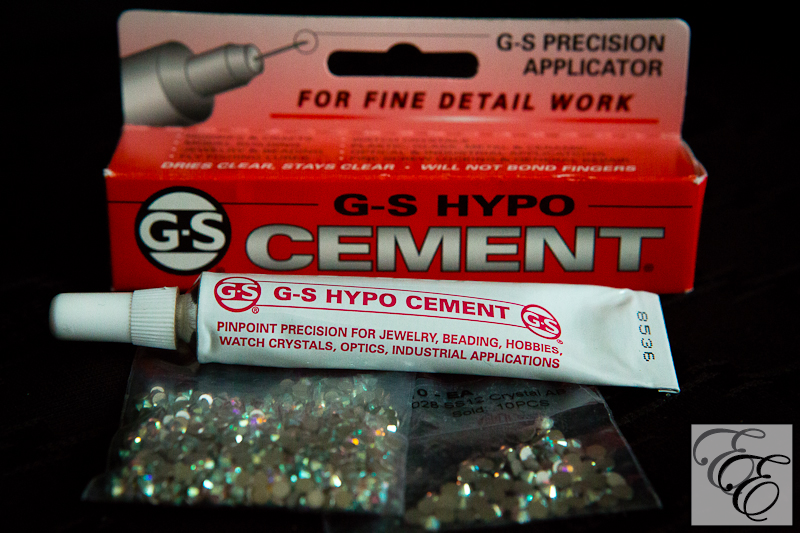

This project takes some patience and attention to detail, so do it in a well-lit environment, preferably with a task light directly above your work area.
I poured a portion of flat-back crystals onto a non-slippery surface (black felt or velvet works well) and arranged them so that the faceted-side faced upwards.
I applied glue to about 0.5″ long areas at a time (I recommend working in small sections, as the glue sets fairly quickly), and then picked up a crystal with the tweezers and placed it in the glue, gently nudging it into exact place. The picking up and placing of crystals may take a little practice. 🙂
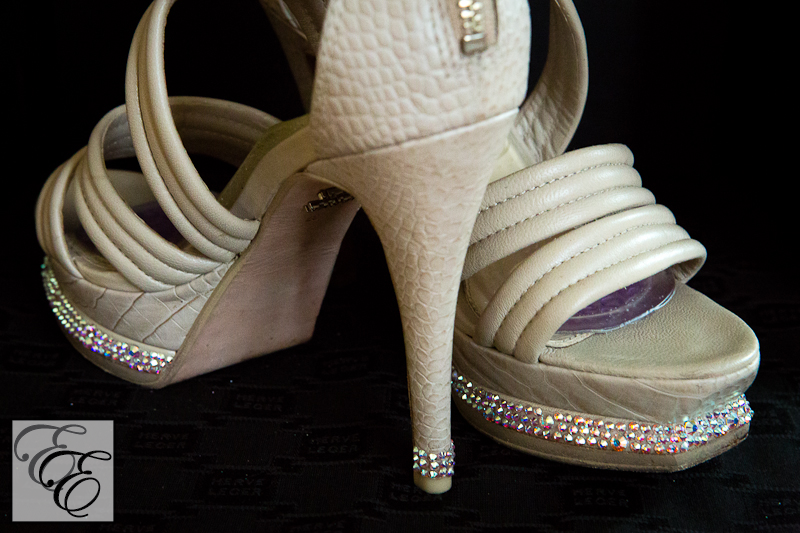
For variety, I interspersed larger 12mm crystals every few rows. This had the advantage of breaking up the row regularity so that I didn’t have to worry about creating precisely-straight lines, as would be more critical when applying same-sized crystals.
The glue sets within the hour, but it should dry at least 24 hours before you plan on wearing the shoes.
To increase comfort, I also added Dr. Scholl’s high heel insoles to the shoe bed and padded foam strips to the back heel.
This was my favorite DIY wedding project, and I LOVE how it turned out. For around $70, you can turn your favorite shoes into dazzling treasures. I only used about 1/6 of the 1,440 piece factory pack, so the actual project cost was less than $20. $20 compared to $3,000!!! (Okay, maybe more like $150 vs $3,000 if you actually have the patience to encrust your entire pair of shoes.) Still… SO worth it.
Because the cost of the crystals goes down significantly when buying in bulk, I recommend buying in volume and saving the extra crystals for another project. After blinging one accessory and admiring the results, I promise you that you’ll soon be eyeing other fav accessories for your next project. 😉
xoxo,
![]()