
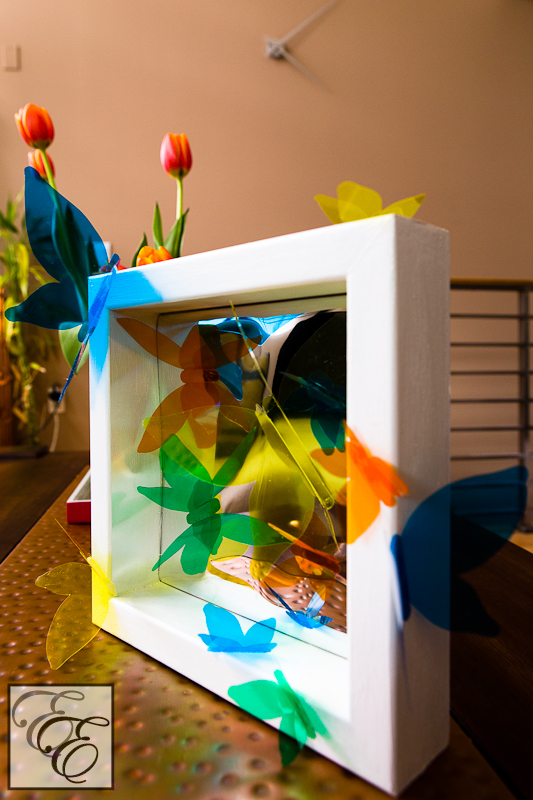
Welcome, Spring! (it’s now official) In honor of the seasonal shift, I felt like doing a project that brought some of the joy of spring into the home.
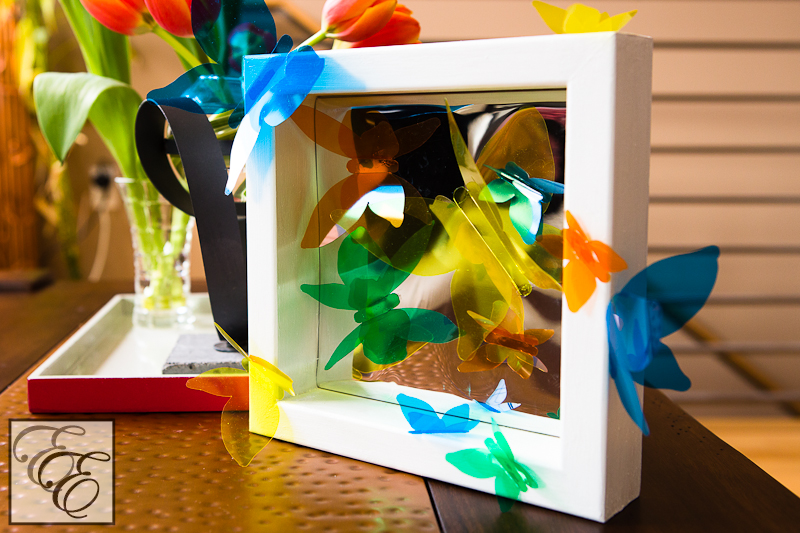
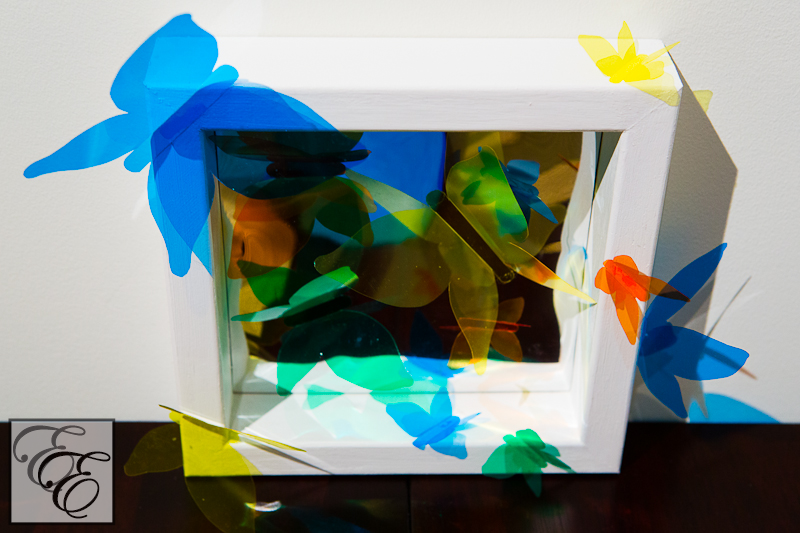
With a wooden frame, colored vinyl sheets, a mylar sheet, some paint, and glue, I created a three dimensional collage of stained-glass vibrant, translucent butterflies settled for a beautiful, suspended moment. Their light acrylic wings vibrate and flutter in a light breeze, and one might imagine that at any moment, they might peel away from their perches and whimsically flit away into the outdoor sunshine.
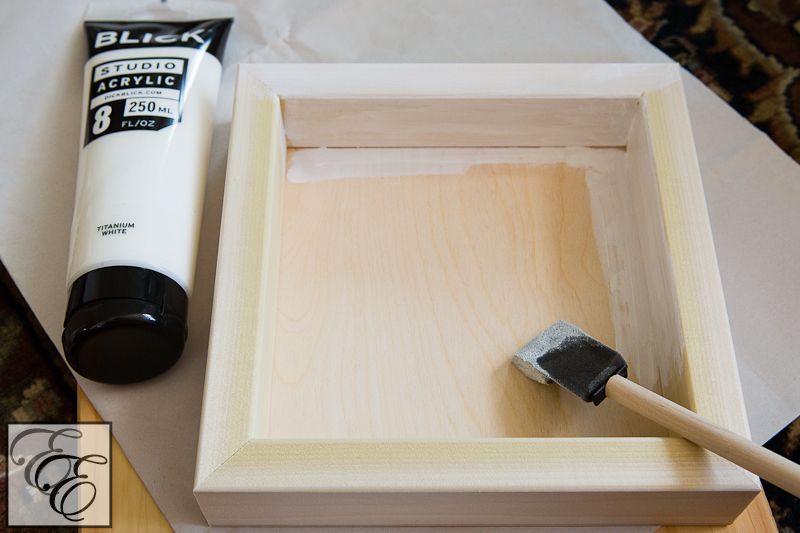
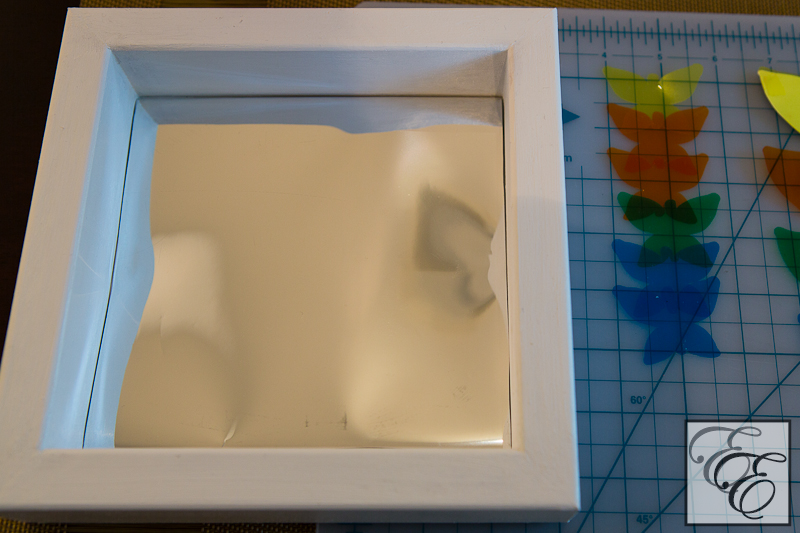
I started out with a simple wood frame. Originally meant as a 1″ elevated painting surface, I instead flipped it over and painted its backside with several coats of matte white acrylic paint. The result was simple and rustic-looking, with the wood texture showed through the paint (vs. a smooth lacquered surface). I thought it was well-suited to the organic, natural feel of the piece.
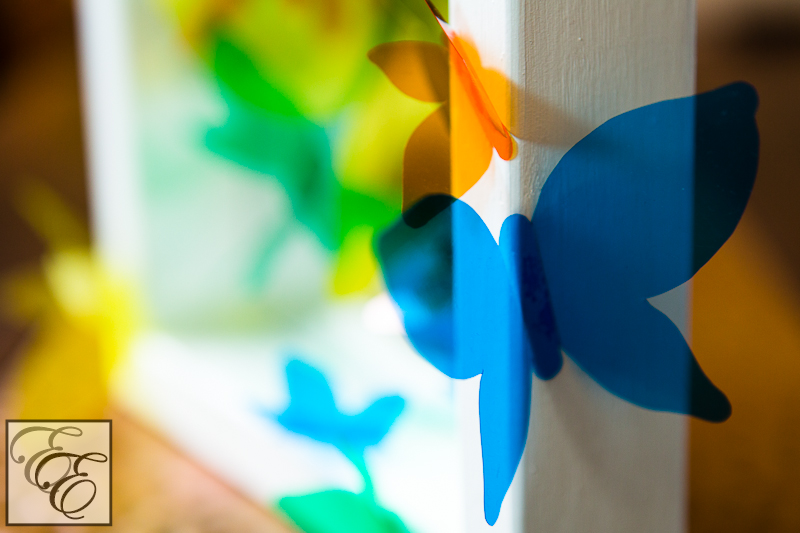
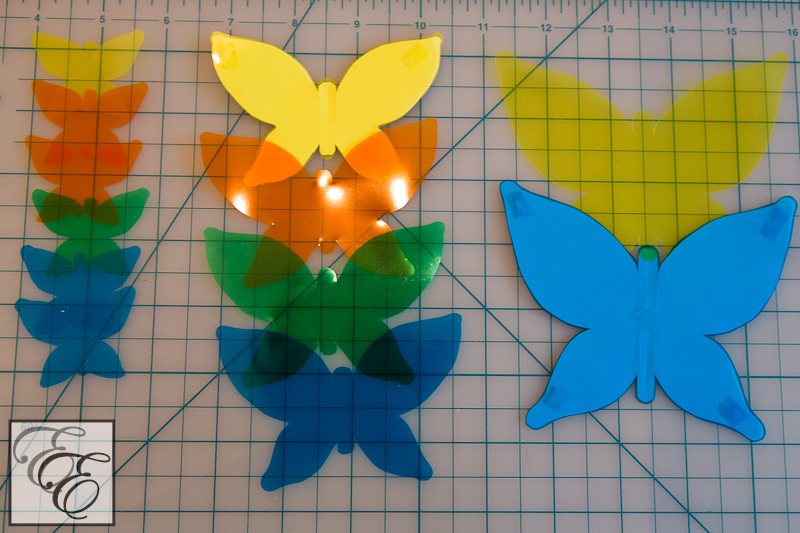
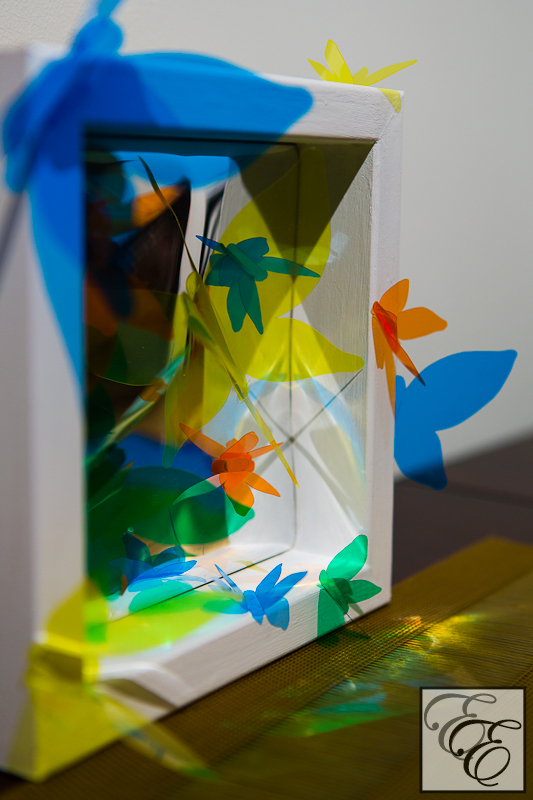
I drew and cut out butterfly shapes free-hand on a piece of paper and then taped them to the back of thin acrylic sheets and cut out shapes with an all-purpose scissor. With an exacto knife and a ruler, I then lightly scored one side of the sheet, between the wings and body (being careful to cut entirely through the sheet), and then created crisp 45-degree angle folds.
What I love about translucent vinyl (I used .010″ flexible sheets; these can be found at fine art supply stores such as Pearl and Blick) is the ability to layer colors and shapes (such as a yellow layer overlapping with a blue one to create a green intersection of curved edges). As I wanted to showcase layering, combined with simple three-dimensional interest, the delicate and elegant profile of a butterfly seemed best-suited to do so.
As I envisioned the butterflies nestled on and within the 1″ deep frame, I wanted to ensure that their bright color wouldn’t be dimmed within the shadow of the frame’s interior, so I create an interior backdrop of a silver mylar sheet to reflect light. As an added bonus, the reflection of the butterfly profiles off of the mylar added complexity to the piece.
I then glued the butterflies to the frame with G-S hypo cement, an adhesive that I use for my jewelry projects and has the advantage of a fine-tipped precision applicator.
The finished result! Remarkably like unconstrained splashes of stained glass… 🙂
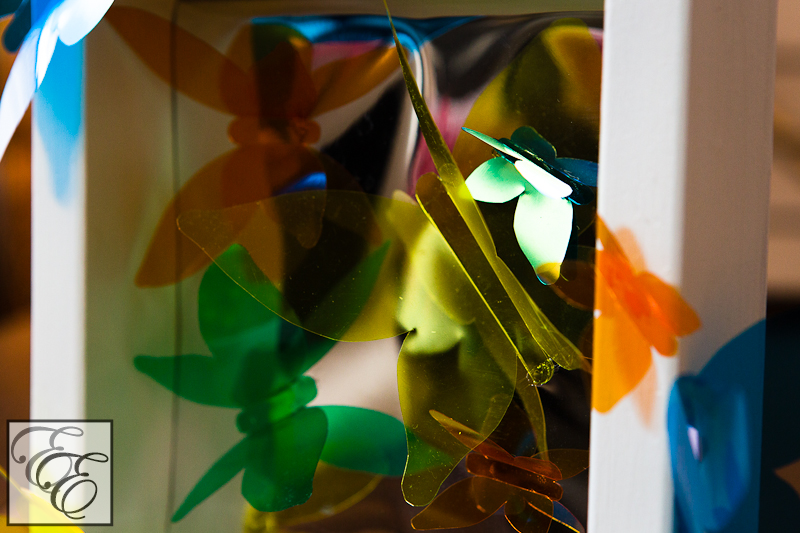
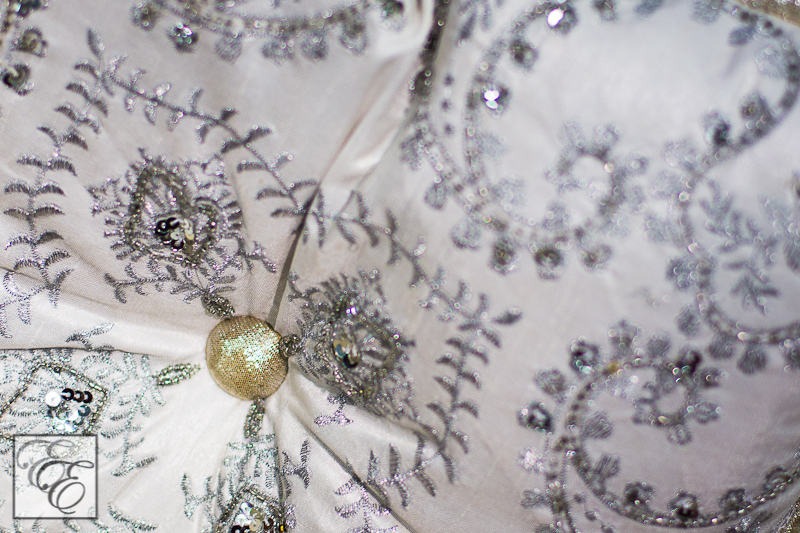
When light passes through the vinyl, all sorts of interesting reflections are created (such as in the photo below, upon the gold mat).
Hello, spring! ^_^
xoxo,
![]()

oooh, love the sheerness of the butterflies. maybe i should try it with like different shades of the same color. cute!
modern.girl
Yes, me too! I have a love affair with color and lighting in general.. when the two intersect… I could just stare in happiness for.. a long, long time.
I would *love* to see a similar project done in shades of the same color! Unfortunately, plastic translucent sheets aren’t made in a wide variety of colors (demand, perhaps? :/ ), so if you wanted to do something with similar shades (somehow, pink just popped to mind. with a sakura theme.), it might have to be done with tissue paper, or by painting a clear surface (e.g. a transparency) with a glass paint or something similar…. that could be thinned out for shading differentiation…